A key part of improving your photography skills is learning how to take shallow depth-of-field photographs. By learning the various techniques and understanding all the variables involved, you can accomplish this. The depth of field will depend on several factors, such as the fstop value and distance between subject/camera. Charts can be used to calculate the f stops. You must also learn how to set shutter release for different depths.
Techniques to attain shallow depth of focus
Shallow depthof field is a useful technique for focusing your lens to bring out one aspect of your subject. This technique allows the viewer to focus their attention on the most interesting parts in the image. It can also be used to blur the background, which creates a sense of depth in the picture.
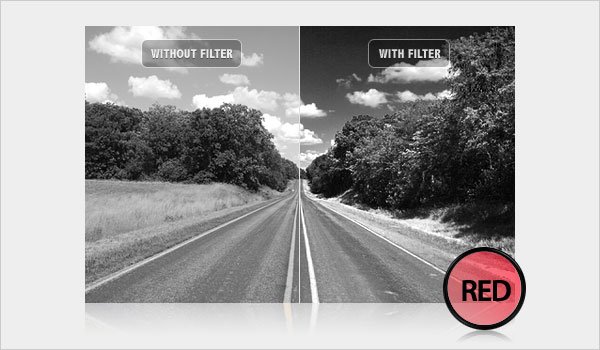
A wide aperture can produce shallow depth of focus, while a smaller aperture will achieve shallower depth. A wide aperture lets more light reach the sensor, leaving less area in focus. Although a wide aperture lens is popular for portrait photography, you don't necessarily need to use one. Changing the aperture is a quick way to get a shallow depth of field photograph. You can also use neutral density filters if your focal length is not important.
Another technique for achieving shallow depth of field is to increase the distance between your camera and your subject. This effect can be achieved even if you don't have a wide-aperture lens. You can zoom in and move away to achieve the same effect. For example, if you're taking a photograph of a tree, try standing 20 feet away from it. You will get a softer background if you are farther away from your subject than the tree.
Charts for determining f-stop value
The aperture must be enlarged if you wish to achieve shallow depth of focus. This will allow for more light to pass through the lens. It is an excellent technique for portraiture. Shallow depth of field photographs are also known as shallow focus photographs.
A depth chart is a tool that can help you determine the depth of field value. These charts will show you how much depth will be in the subject and at what f-stop. These charts can be printed and laminated for added convenience. It is essential to select the correct chart for each lens.
Generally, f-stops can be measured in increments up to one third. The smallest aperture size possible is f/8. While the largest is at f/16. The larger the aperture the more light it lets in to the lens. Large apertures will give you more detail and contrast. A smaller aperture will reduce blurring and focusing, which will enable you to capture a shallower depth.
Distance between camera and subject
Deep field photography is made possible by the distance between the subject of the camera and the camera. With the changing apertures, the out-of focus areas of the lenses will dramatically change due to light passing through them. In the same way, distance between subject (camera) and subject (subject) will determine the extent of the out of focus area. The result is that a larger aperture will create a deeper DOF. However, a smaller aperture can produce a more narrow DOF. In order to change the DOF, a photographer can adjust the aperture, move closer to the subject or change the focal length.
The distance between the camera and subject can vary, but generally speaking, the closer the subject is, the deeper the depth of field will be. A close-up portrait could have a background that is too blurred, while a landscape shot might have trees and a nearby river as the foreground. Mountainous areas may also be out in focus. Because the distance between the subject and the camera shrinks as the rays travel through the lens, this is called the far DoF. Therefore, the Far DoF is greater than the Near DoF.
Focal length
The focal length of your lens is important when taking depth-of-field photographs. Focal length not only impacts the subject's depth but also influences how sharp the image is. Using a longer lens will give you a more shallow DOF than a shorter one.
The distance between the subject and the lens is what determines your DOF. This is known as the depth-of-field ratio. The greater the distance between the subject and the camera, the wider the depth of the field. You can also increase the DOF by moving back or opening the aperture. But, it is important to note that the focal length must be doubled if the subject's distance increases by at least two times. This means that the focal length is twice as important as the f/stop when it comes to defocusing.
A longer focal length makes the background seem larger in comparison to the foreground. A narrower angle of vision makes the background appear sharper.
Focus distance
The main subject of depth-of field photos should always be in focus This will draw attention naturally. The photographer must decide the proportions of the background and the foreground to be in focus. The distance between the foreground and background is the depth of focus.
The closer the depth of field, then the better the subject will focus. Using different focus distances in depth of field photographs can make the subject appear closer or farther away. The background can appear blurred if the focus distance is changed.
FAQ
What is the rule to thirds in photography
The rule to thirds is a great way to create interesting compositions. It divides your photo into nine equal parts horizontally as well vertically. This divides your image into three areas that you would like to see your subject. These are the top (3rd from the left), middle (3rd from center) and bottom (3rd from lower right). These areas can be used as guidelines for positioning your subject within the frame.
You can avoid placing important elements too close together, or too far apart, by using the rule of thirds. You might not have enough space between them for a strong visual impact if you put them close together. If they are placed too far apart, it can cause them to lose focus.
How can I look great in photos?
Photographing yourself is the best way to make sure you look professional in your photos. You'll learn how you pose for the camera and which angles are best. Learn how to use lighting, props and other tools to enhance your natural beauty.
You'll discover how to choose clothes that fit well, make-up that looks great on you, and hairstyles that suit your face shape and style.
We'll also show you how to retouch images with Photoshop or other editing software if you aren't satisfied with the results.
Do yourself a favor and take some self portraits!
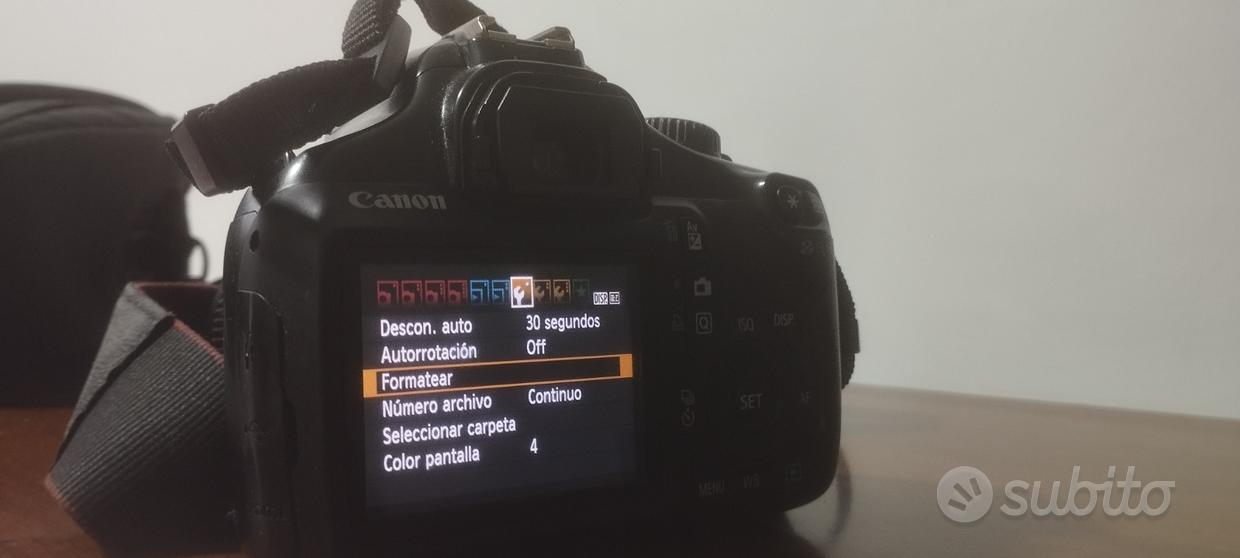
What camera is best for beginners and what are the pros and cons?
The best camera for beginners will depend on your budget, needs and level of skill.
For example, if you're looking to save money, you might choose a point-and-shoot digital camera. These cameras are not very versatile but offer excellent quality.
Digital Single Lens Reflex (DSLR) cameras have interchangeable lenses that allow you to shoot various types of shots. These lenses are usually more expensive than point-and shoots, but offer greater flexibility.
A beginner's kit is the best place to begin if you are new to photography. Everything you need, including a flash, tripod, memory card and camera body, will be included in the one-pack.
Make sure to purchase extra batteries.
Which Camera Should I Buy?
All depends on the type of photographer that you want to be. If you are just starting out, a basic point-and shoot camera is all you will need.
You'll probably want something more advanced once you've learned the basics. The decision is yours.
Here are some things to consider before purchasing a camera.
-
Features: What features are you looking for? Do you intend to use manual or autofocus settings? How many megapixels does your camera have? Is there a viewfinder on your camera?
-
Price: How much will you spend? Are you planning to upgrade your camera every year or two?
-
Brand: Do you feel satisfied with the brand you choose? You don't have to settle for anything less than the best.
-
Functionality: Can your camera function well in low light conditions Are you able to take high-resolution images?
-
Image Quality: How clear and sharp are your images?
-
Battery Life: How much time will your camera last without needing to be recharged?
-
Accessories: Do you have the ability to attach flashes, additional lenses, and so forth? ?
Statistics
- This article received 13 testimonials, and 100% of readers who voted found it helpful, earning it our reader-approved status. (wikihow.com)
- By March 2014, about 3 million were purchased monthly, about 30 percent of the peak sales total. (en.wikipedia.org)
- Get 40% off Adobe Creative Cloud(opens in new tab) (creativebloq.com)
- While I cannot prove that all of those spots were not sensor dust, the photo was taken during a heavy snowstorm…so I guess that 99.8% of the spots are snowflakes. (bhphotovideo.com)
External Links
How To
How to Take Portrait Photos
Portraits are important as they reflect who you are. Portraits also tell your story. Perhaps you have a favorite image of yourself from when you were younger. But now, you want to capture something more. It is easy to forget how much fun it can be to take pictures. These tips will help you get started.
-
Make sure you have enough light. Portraits are best taken in the morning or late at night. Use flash only when there is not direct sunlight. This will wash out any details. Also, don't shoot at noon. Too many shadows will result.
-
Use a tripod. The camera will not move if it is held still. The camera will not freeze the action. Also, if you do plan on using a flash, prepare your shot without it. After that, turn off the flash again and start over.
-
Shoot close-ups. Closeups are great to demonstrate detail. They can also look fake if they aren't done well. Pay attention to the eyes, noses, and mouths of people. Are you noticing anything odd? Is it possible that someone is wearing glasses? Are there freckles around her nose? These elements add depth to a person’s appearance.
-
Don't force smiles. Smiles are difficult. Smiles can be tricky. Many people smile naturally when feeling happy. It's not natural to make them smile if you force them. You should think about what makes your laugh. You might find something silly, like a cat leaping through a hoops. Or maybe you love watching paint dry. Whatever it is, think about it until you find yourself laughing.
-
Be creative. Many people think they are boring. However, being boring is not a bad thing. Find ways to get out of the normal. Perhaps you ask the person to place his hands behind your back, or pose with his hands behind your back. You could also suggest having him wear an amusing hat.
-
Keep practicing. If you practice every day, eventually, you'll become better at capturing moments. As you improve, you'll notice more interesting things happening around you.
-
Have fun. You should have fun taking photos. You'll be more inclined to return to the same process if you enjoy it. You might even end up with some pretty cool photos.
-
You should share your work. Once you are able to take high-quality pictures, share them. Tell them why the photo was taken. Tell them where you went. Tell them what you did.
-
Be patient. Sometimes things just don't click. It happens every day. Don't worry. Move on to the next image.