
There are many Nikon cameras that are excellent, making it hard to decide which one you want. Let's take you through Nikon's Z5, the entry-level mirrorless camera. The D850 is the all-rounder. And the P1000 is the compact bridge camera. Which is the best? Read on to find out! Check out these tips to help you buy a Nikon camera. It is guaranteed to make your life easier and help you capture the best photos.
The Z5 is Nikon's entry-level, mirrorless camera.
The Nikon Z5 is a decent camera, but if you're just starting out with the mirrorless system, the Z6 might be a better choice. It offers the same 24-megapixel resolution, but isn't equipped with back-illuminated scanners. This means that the Z5 sensor will be the last in line. That said, the Z6 should offer cleaner pictures at higher ISOs.
The Nikon Z5 isn't a true hybrid camera. You will need to crop your 4K video image 1.7 times because it does not have a vari-angle view. The 24-mm lens of the camera becomes a 40.8-85mm zoom in 4K mode. This makes it less likely to capture everything in the frame, particularly if the self-shooter mode is used.
Nikon's all-rounder is the D850
Nikon's latest all-rounder includes a metering device similar to the D500/D5. The D850's sensitive range nearly doubles with the 180,000-pixel RGBCMOS sensor. This camera has both the traditional spot and center-weighted metersing modes. It also features an Auto Picture Control feature. You can also control the camera using the viewfinder, manual focus mode, and all of its other controls.
The D850's large rear LCD screen is tilting in a bracket and measures 3.2 inches by 2,359,000 pixels. The touch-sensitive screen can be used to control the brightness and clarity of the large LCD screen. You can scroll through hundreds upon hundreds of images and then rate them. Then you can choose the ones that are most interesting to you. With its excellent autofocus, the Nikon D850 is a great camera for most situations.
The Nikon P1000 compact bridge camera is the P1000
The Nikon P1000 compact bridge camera features a variety of familiar buttons. Many of these buttons will be familiar to anyone who's used a Nikon DSLR or bridge camera. There's a scrolling dial that serves as a four-way navigation pad. Access to most functions of the camera, including exposure compensation, macrofocusing and flash, can be accessed via the dial. The P1000 supports Bluetooth and WiFi connectivity.
Nikon Coolpix P1000 bridge camera is 16 Megapixels. It has an optical zoom lens which offers a 24-3,000mm effective range. It also includes NFC and GPS connectivity. It's perfect for celestial photography and birding. It can record 4K movies, which is an unprecedented feat for a compact bridge cam. The lens is also fast, allowing you to capture movies in high definition.
Nikon's APSC-C camera the Z50
Nikon has announced the Nikon Z 50, a new APS-C camera. It was unveiled by Nikon on October 10, 2019, The Nikon Z 7 and Z 6 are the two previous crop sensor Zmount cameras that the company introduced. The company has now released three new crop sensor camera bodies using this mount: the Nikon Z7 (with Nikon X), and the Nikon Z6 (with Nikon X). The Z50, however, has a few distinct features that set it apart from other Nikon APS–C camera models.
While the Nikon Z50 is a nice camera, it has one big flaw that may prevent it from being a great camera for everyone. Although it's designed to be used by the Instagram generation, it's no professional camera. That's it. Without a tripod, this camera is unable to do much. You can use the remote control to operate the camera remotely.
FAQ
How do I learn to take photos on my own?
There are many methods to learn how you can take amazing photos. You have the option to buy a book and attend classes, join an on-line community, or watch YouTube tutorials. If you really want to learn how to take pictures, it's best to do it yourself. So you can decide what goes into each picture. You will continue to learn and improve, so long as you are willing to keep learning.
In fact, one of the best things about digital photography is that you don't even need expensive equipment. All you require is an internet-enabled computer and a good camera. The rest is up to you.
These are some suggestions to help you get started.
-
Get familiar with your camera's manual settings.
-
Learn the basics of controlling your computer.
-
Take lots of photos.
-
Edit them.
-
Share them.
-
Keep practicing.
-
Experiment.
-
Explore different perspectives and angles.
-
Use light sources creatively.
-
Practice makes perfect.
-
You don't have to be afraid of failing.
-
Be patient.
-
Have fun
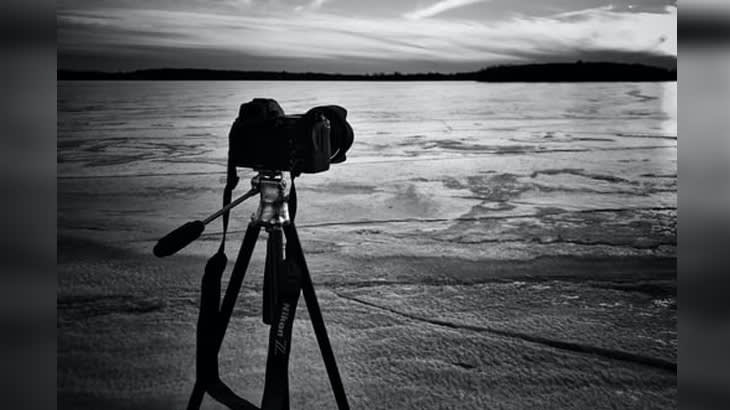
Do I Need A Tripod?
This is one those questions that everyone has to ask. The truth is that a tripod isn't always necessary, but it can come in handy.
This allows you to keep your camera steady even when taking slow shutter speeds. A tripod can make all the difference when you're photographing landscapes or other stationary subjects.
A tripod can also cause blurriness when you are photographing people or sports. So, how do you know which situations require a tripod?
A tripod is an essential tool for photographing fast-moving subjects or stationary objects. Examples include:
-
Sports
-
People
-
Landscapes
-
Close-ups
-
Macro shots
This test will help you determine if you need a tripod. Look through the viewfinder with your camera steady. If blurred lines appear or you feel movement, you will definitely need a tripod.
If you don’t see blurring, adding a tripod is unlikely to make any difference.
These are just a few tips to help you decide whether or not to purchase a tripod.
-
Your tripod should have smooth legs. This prevents unwanted vibrations from shaking your camera.
-
Make sure you choose a sturdy tripod. Some tripods are made out of plastic and may not be very durable. You should opt for a steel tripod.
-
Consider purchasing a remote release. This allows you to control your camera remotely. This allows you to set the shutter to automatically fire when you press it.
-
Make sure to look for a tripod that rotates 360 degrees. It makes it easy to position your camera horizontally or vertically.
-
You should keep in mind that tripods don't come cheap. Expect to spend between $100 and $200. You'll still get a lot for your money.
-
Accessories such as memory cards and filters are important.
-
Before you buy online, make sure to check your local shops. Many retailers offer shipping free of charge.
-
Read reviews to determine what customers think about a particular product.
-
Ask family members and friends who own similar products.
-
For customer feedback, visit message boards and forums.
-
Look online for user reviews.
-
Use websites like Amazon.com to compare prices and read customer feedback.
-
See photo galleries to see some of the creative uses for tripods by photographers.
What camera should I get?
That all depends on what kind of photographer you want to become. A basic point and shoot camera is enough if you are just starting.
But once you are comfortable with the basics, you will probably need more. Personal preference is the only way to decide.
Before you buy a camera, here are some points to remember.
-
Features: What features do I need? Will you use manual settings or autofocus? How many megapixels do you have on your camera? Is there one?
-
Price: How much money are you willing to spend? Do you plan to update your camera every other year?
-
Brand: Do you feel satisfied with the brand you choose? You shouldn't settle for less.
-
Functionality: Can your camera function well in low light conditions Can you take high-resolution photos?
-
Image Quality: How clear and sharp are your images?
-
Battery Life: How long does your camera last between charges.
-
Accessories: Will you be able to attach additional lenses, flashes, etc. ?
What can I do to improve my photography skills with my phone?
Great photos don't require expensive equipment! You can take amazing photos with just a phone.
All you need to do is to be able to use the features of the program and to master some basic techniques.
There are many apps that both Android and iOS users can use to edit and share their photos.
If you want to start taking better photos, here are five tips to help you get started.
-
Set Up Your Camera App. Your camera app should come pre-installed on your device. You can download the camera app from Google Play and Apple's App store.
-
Use Effects & Filters. You can change the look of your photo with filters and effects without even touching it.
-
Adjust Exposure. You can adjust the exposure to control the brightness of your photo.
-
Shoot In The Right Light. It is easier to see details when you shoot in bright light. Photographing in low light conditions allows you to capture the highlights and shadows of your image.
-
Take Pictures of People. Photographing people can show others what you are most passionate about.
Check out this article to learn how to take better pictures with your smartphone: 5 Tips To Improve Photography Skills
What camera is the best for beginners, and why?
The best camera for beginners will depend on your budget, needs and level of skill.
A point-and-shoot camera is a good option if you want to save money. These cameras aren't as versatile as they look, but they provide good quality.
The Digital Single Lens Reflex (Digital DSLR) camera allows you to interchange lenses, allowing you to take different kinds of photos. These cameras are generally more expensive that point-and clicks, but provide greater flexibility.
For those new to photography, a beginner's kit is a great place to start. You'll find everything you need in one package, including a camera body, lens, memory card, tripod, and flash.
Don't forget to buy extra batteries too!
Which Lenses Are Best?
Most beginners will ask this question: "Which lens should I buy?" There are many options. It can be difficult to make a decision.
The good news is you don't always need to buy a different lens with every purchase of a camera. You can always add lenses later.
Here are three types you might be interested in.
-
Wide Angle Lens: 14mm - 24mm: These lenses provide a wide angle of vision, which allows you to capture more details of your subject. You can zoom in to improve image quality.
-
Standard/Normal Zoom Lens (28mm-70mm): These lenses let you change the focal length while still maintaining excellent image quality.
-
Telephoto Zoom Lens (70mm–200mm) : These lenses are ideal for photographing distant subjects. These lenses let you focus on the subject even if they are small.
You can also combine these lenses to create different effects. Combining lenses can create different effects. For example, a normal lens could be used to capture small details while a telephoto lens is used to capture faraway objects.
Statistics
- In this case, 100% of readers who voted found the article helpful, earning it our reader-approved status. (wikihow.com)
- While I cannot prove that all of those spots were not sensor dust, the photo was taken during a heavy snowstorm…so I guess that 99.8% of the spots are snowflakes. (bhphotovideo.com)
- The second easiest way to get blurry photos 100% of the time is to use a cheap filter on the front of your lens. (photographylife.com)
- By March 2014, about 3 million were purchased monthly, about 30 percent of the peak sales total. (en.wikipedia.org)
External Links
How To
How to take photos in low light conditions
Low-light Photography is when you take photos in dimly lit or dark environments. It requires special equipment. The main challenges in this field include controlling exposure, whitebalance, and sharpness. Low light photography can be divided into two categories: ambient and flash. Flash photography is best when there is enough light. A flash is required if there isn’t enough light. If your subject is outdoors but indoors, you might not have enough light to take a great picture without a flash. You can also shoot at night when the moon is shining. This will give you some beautiful shadows and colors. Another option is shooting at twilight. Twilight is when the sun sets but there's still daylight.
You might also be interested in long exposures. Long exposures can be used to capture images even if the shutter has been closed for several minutes. If the shutter is closed, the camera records only the light that falls onto the sensor. During a long exposure, this light continues to fall onto the photo sensor. The shutter is still closed so no light can enter the lens. The result is that there is very little movement. To ensure you're getting a clear image, turn off any automatic settings like autofocus and auto exposure. Before you begin shooting, adjust your ISO setting. An ISO setting of 200 gives you more flexibility to control how bright or dark your image looks. Next, click quickly on the shutter button to capture the shot. The shutter will close completely. Hold the shutter button down for the final second. You can prevent any additional light entering your camera by holding the shutter button down. Once you have taken the image, wait for a few seconds before you release it. This allows your camera to process the picture. While waiting, you can check out your photos on your computer screen. Once you're satisfied with them, save them to your computer.