It is important to take into account vantage points when shooting photographs of cityscapes. These are typically places where the skyline is unobstructed by buildings and other objects. Once you have selected a vantage location, you'll need a frame to hold the cityscape. You'll also need to decide how much space you will leave at the sides. Also, remember people and reflections. These factors can affect the final image depending on where you are shooting.
Wide-angle lens
When the sun is at its most beautiful, the best time to capture cityscapes is either before or after sunset. You can create interesting distortion effects by using wide-angle lenses, such as turning mountains into molehills. Wide-angle lenses also make foreground objects appear larger and more interesting. But, wide-angle lenses can be hard to use for other purposes such as portraits and wildlife photography.
Long shutter speed
A large number enjoy photographing cityscapes. They aren't familiar with the techniques. For a cityscape photograph to be successful, you need patience and some research. You don't want crowds to stop you from arriving at your destination early. Explore different vantage points to find the best angle. You can use compositional rules, such as the rule-of-thirds, to guide your viewers' eyes around the composition.
Reflections
There are many creative ways that reflections can be incorporated into photos of cityscapes. Reflective props can be used to make a photo more interesting and to add depth. A small reflective object is more effective because you can control its position better. Broken mirrors are great for creating a mystery feel in your photos. These are all ways to enhance photos of cityscapes without losing their aesthetic appeal.
People
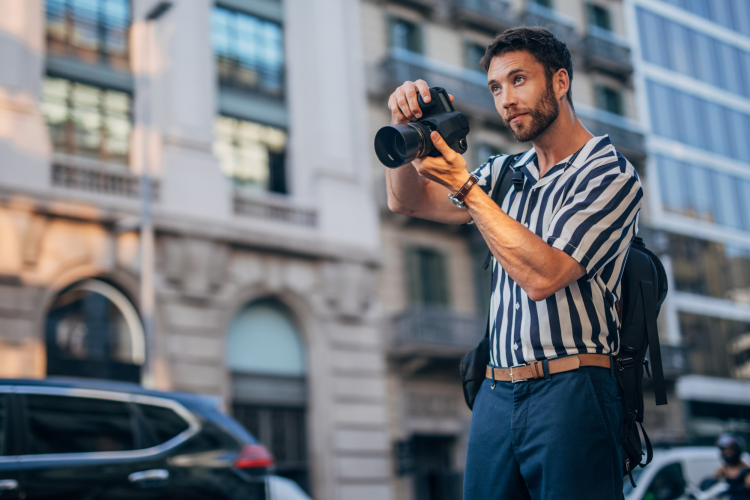
The best background for cityscape photography is important. It is important to have a background that is interesting enough for your subject to not get lost if you're photographing in crowded cities. It may be a pedestrian in the street, or an intrepid traveler, but adding a person to a cityscape photo will add interest and a human element to your composition. Ideal shutter speeds for this type of photograph are between 3 and 6 seconds. Also, a strong neutral density filter is recommended. A slow shutter speed will not allow enough light to enter your camera. Your cityscape photography should be done during peak hour traffic.

Planning
When planning cityscape photography, there are a few important factors to consider. Unobstructed skylines are a must. If you plan on shooting the Empire State Building, you'll need a good vantage point from which to see the city's skyline. Google Street View allows you to search for locations. Next, you can use your Photographer’s Ephemeris for lighting planning.
FAQ
Light Room can enhance your photos.
It is important to begin early in order to have great photos. It's always better to take as many shots as possible and then pick the ones that will give you the most bang for your buck.
Lightroom allows you to do this by letting you see how different settings affect each photo. You can also adjust these settings on-the-fly without going back into Photoshop. This allows for quick experimentation with what looks good or not.
How do I look good in pictures?
You can look great in photos if you take them yourself. You'll learn how to pose for the camera, what angles are flattering, and which ones aren't. You'll also learn how to use lighting and props to enhance your natural beauty.
You'll learn how to find clothes that fit and make up that looks great on your skin.
If you are not happy with your results, we will show you how you can retouch them using Photoshop and other editing tools.
Do yourself a favor and take some self portraits!
What camera is best for beginners and what are the pros and cons?
The best camera for beginners depends on your budget, needs, and skill level.
For example, if you're looking to save money, you might choose a point-and-shoot digital camera. These cameras can be very versatile, but they offer excellent quality.
Digital Single Lens Reflex cameras come with interchangeable lenses which allow you to capture different types of images. These lenses are usually more expensive than point-and shoots, but offer greater flexibility.
A beginner's kit for beginners is a good place to start. Everything you will need, including a tripod, flash, memory cards and lens, can be found in one package.
Make sure to purchase extra batteries.
Is digital photography hard?
Digital photography can be difficult. Learning how to properly use the tools takes effort and time. You must know the right settings for different types shots. Learning by doing is the best way to learn. Practice makes perfect.
What equipment do I need to get started in digital photography?
First, you need to decide what type of camera is best for you when you first start digital photography. You have several options, including DSLRs (digital single lens reflex cameras), point-and-shoot compact cameras, camcorders, and smartphones. Each camera has different benefits and features. For example, DSLR cameras offer high-quality images but are typically larger and heavier than other types of cameras. Point-and shoot cameras are smaller, lighter and have more automatic settings. Camcorders offer excellent video recording capabilities, and may also have still photo shooting modes. Smartphones are small and lightweight so they can be easily carried.
Once you've made a decision about the type and model of camera you want, then you must decide whether you want to buy it new or used. Even if the cameras were bought in the last few decades, they can still be purchased at reasonable prices. Newer models cost more, as manufacturers spend a lot of money on developing new technology.
Next, purchase lenses. Lenses are crucial in determining the quality and appearance of your photos. They let you adjust the focal length to zoom in and out of the scene, without losing focus. Some lenses have built-in flash units, while others require external flash units. There are many brands that offer a wide variety of lenses, each with its own unique characteristics.
Finally, you'll need to buy memory cards. Memory cards save pictures taken with your camera. It can hold hundreds to thousands of photos, depending on how big your card is. Multiplying your memory cards is necessary if you are going to be taking lots of photos.
What is the rule to thirds in photography
The rule to thirds is a great way to create interesting compositions. It divides your photo into nine equal parts horizontally as well vertically. It creates three main areas, where your subject should appear. These are the top third (the upper left corner), middle third (center), and bottom third (lower right). You can use these areas as guides for positioning your subject within your frame.
The rule of thirds also helps you avoid placing important elements too close together or too far apart. They might not have enough space to make an impact on the eye if they are placed close together. If you put them too far apart, they might lose focus because there isn't much room around them.
Statistics
- While I cannot prove that all of those spots were not sensor dust, the photo was taken during a heavy snowstorm…so I guess that 99.8% of the spots are snowflakes. (bhphotovideo.com)
- That's the easiest way to get blurry photos 100% of the time. (photographylife.com)
- Get 40% off Adobe Creative Cloud(opens in new tab) (creativebloq.com)
- This article received 13 testimonials, and 100% of readers who voted found it helpful, earning it our reader-approved status. (wikihow.com)
External Links
How To
Lightroom: How to Use It in Photography
Adobe Lightroom can be used by photographers to easily edit photos. It allows you to import your images into one place where they can be viewed, edited, cropped, lightened, and saved. You can share them online or print them.
In addition to editing tools like cropping, adjusting brightness, contrast, and color balance, Lightroom includes a library of presets that make it easy to apply common effects such as vignette, lens distortion correction, and black & white conversion. The best thing is that these adjustments can be applied automatically after you export your image.
Adobe Bridge allows you to access Lightroom. This lets you view thumbnails and organize your files while browsing through your collection. You can even add keywords in your images to help you find them later.
Lightroom's free trial version is a good choice if you're just getting started. This will give you the most basic features. There are two options available if you choose to upgrade. You can either purchase the full version right away or subscribe.
There are several ways to download Lightroom. Adobe may offer the software for purchase. Another option is to download the trial and convert it to a full-featured license. Here's how.
-
Lightroom Trial Version
-
Start the program and click the "Convert License" button at the bottom.
-
Choose the type of license you want (one year or perpetual) and enter your payment details.
-
Click "Continue" to complete the process.
-
Once you've converted the trial to a full-paid license, you are allowed to continue using it for the remainder of the term.